As a consultant, I’ve done a lot of Java projects in different "enterprise" environments. In general, the Continuous Integration stack - when there’s one, is comprised of:
- Github Enterprise or Atlassian Stash for source version control
- Jenkins as the CI server, sometimes but rarely Atlassian Bamboo
- Maven for the build tool
- JaCoCo for code coverage
- Artifactory as the artifacts repository - once I had Nexus
Recently, I started to develop Kaadin, a Kotlin-DSL to design Vaadin applications. I naturally hosted it on Github, and wanted the same features as for my real-life projects above. This post describes how to achieve all desired features using a whole new stack, that might not be familiar with enterprise Java developers.
Github was a perfect match. Then I went on to search for a Jenkins cloud provider to run my builds… to no avail. This wasn’t such a surprise, as I already searched for that last year for a course on Continuous Integration without any success. I definitely could have installed my own instance on any IaaS platform, but it always pays to be idiomatic. There are plenty of Java projects hosted on Github. They mostly use Travis CI, so I went down this road.
Travis CI registration
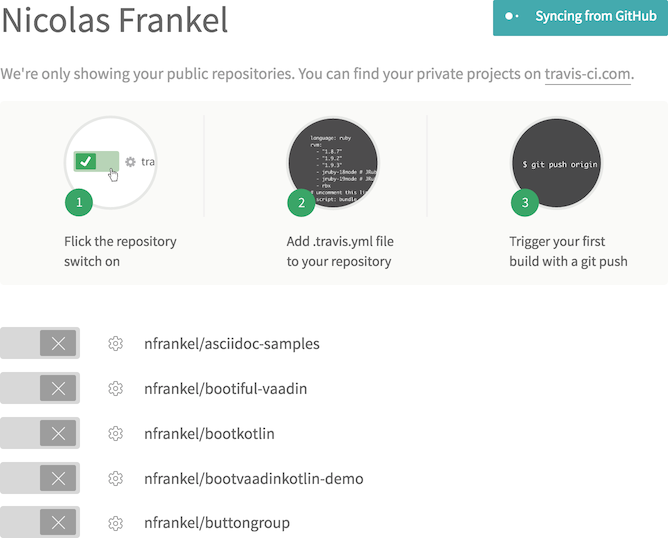
Registering is as easy as signing in using Github credentials, accepting all conditions and setting the project(s) that need to be built.

Basics
The project configuration is read from a .travis.yml file at its root.
Historically, the platform was aimed at Ruby, but nowadays different kind of projects in different languages can be built.
The most important configuration part is to define the language.
Since mine is a Java project, the second most important is which JDK to use:
language: java
jdk: oraclejdk8
From that point on, every push on the Github repository will trigger the build - including branches.
Compilation
If a POM exists at the root of the project, it’s automatically detected and Maven (or the Maven wrapper) will be used as the buidl tool in that case. It’s good idea to use the wrapper for it sets the Maven version. Baring that, there’s no hint of the version used.
As written above, Travis CI was originally designed for Ruby projects. In Ruby, dependencies are installed system-wide, not per project as for Maven. Hence, the lifecycle is composed of:
- an install dependencies phase, translated by default into
./mvnw install -DskipTests=true -Dmaven.javadoc.skip=true -B -V - a build phase, explicitly defined by each project
This two-phase mapping is not relevant for Maven projects as Maven uses a lazy approach: if dependencies are not in the local repository, they will be downloaded when required. For a more idiomatic management, the first phase can be bypassed, while the second one just needs to be set:
install: true
script: ./mvnw clean install
Improve build speed
In order to speed up future builds, it’s a good idea to keep the Maven local repository between different runs, as it would be the case on Jenkins or a local machine. The following configuration achieves just that:
cache:
  directories:
  - $HOME/.m2
Tests and failing the build
As for standard Maven builds, phases are run sequentially, so calling install will first use compile and then test.
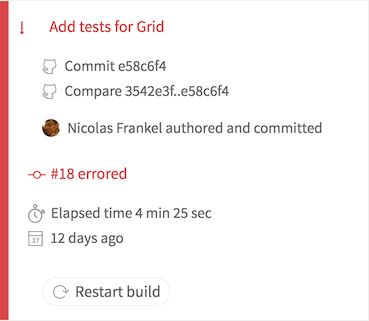
A single failing test, and the build will fail.
A report is sent by email when it happens.

Most Open Source projects display their build status badge on their homepage to build trust with their users. This badge is provided by Travis CI, it just needs to be hot-linked, as seen below:
Code coverage
Travis CI doesn’t use JaCoCo reports generated during the Maven build. One has to use another tool. There are several available: I chose https://codecov.io/, for no other reason than because Mockito also uses it. The drill is the same, register using Github, accept conditions and it’s a go.
Codecov happily uses JaCoCo coverage reports, but chooses to display only lines coverage - the less meaningful metrics IMHO. Yet, it’s widespread enough, so let’s display it to users via a nice badge that can be hot-linked:
The build configuration file needs to be updated:
script:
  - ./mvnw clean install
  - bash <(curl -s https://codecov.io/bash)
On every build, Travis CI calls the online Codecov shell script, which will somehow update the code coverage value based on the JaCoCo report generated during the previous build command.
Deployment to Bintray
Companies generally deploy built artifacts on an internal repository. Open Source projects should be deployed on public repositories for users to download - this means Bintray and JCenter. Fortunately, Travis CI provides a lot of different remotes to deploy to, including Bintray.
Usually, only a dedicated branch should deploy to the remote e.g. release.
That parameter is available in the configuration file:
deploy:
  -
    on:
      branch: release
    provider: bintray
    skip_cleanup: true
    file: target/bin/bintray.json
    user: nfrankel
    key: $BINTRAY_API_KEY
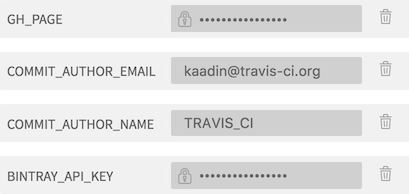
Note the above $BINTRAY_API_KEY variable.
Travis CI offers environment variables to allow for some flexibility.
Each of them can be defined as not to be displayed in the logs.
Beware that in that case, it’s treated as a secret and it cannot be displayed again in the user interface.

For Bintray, it means getting hold of the API key on Bintray, creating a variable with a relevant name and setting its value. Of course, other variables can be created, as many as required.
Most of the deployment configuration is delegated to a dedicated Bintray-specific JSON file.
Among other information, it contains both the artifactId and version values from the Maven POM.
Maven filtering is configured to automatically get the content from the POM and source it to the configuration file to use: notice the path reference is under the generated target folder.
Conclusion
Open Source development on Github requires a different approach than for in-house enterprise development. In particular, the standard build pipeline is based on a completely different stack. Using this stack is quite time-consuming because of different defaults and all the documentation that needs to be read, but it’s far from impossible.